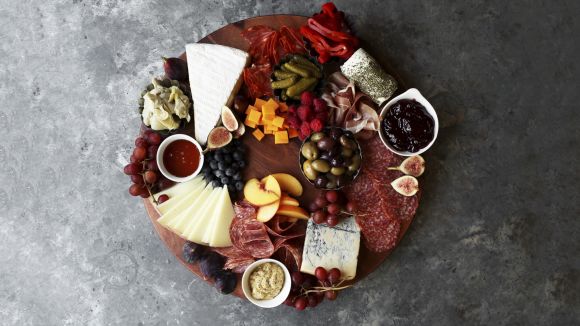
I found this article on food.com and really enjoyed it, as I love a great Charcuterie Board and this article gave something to think about. Although my boards usually look pretty good, they are not as beautiful as the one shown below.
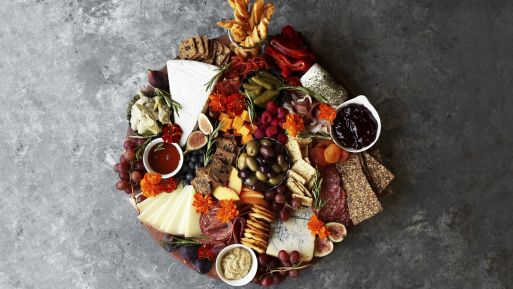
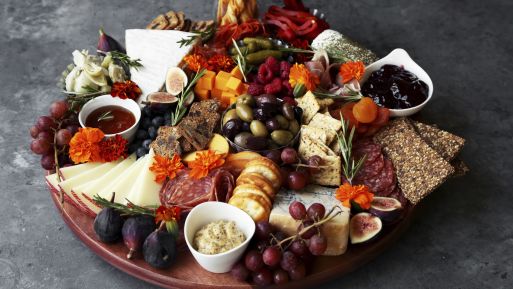
Do you ever scroll through picture-perfect cheese boards and think, “I could never do that”? The good news is, it’s a lot easier than it looks! Just follow this easy, step-by-step tutorial to build an epic charcuterie board for any occasion.
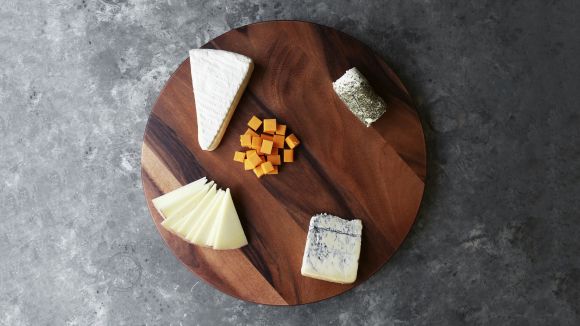
FIRST THINGS FIRST: CHEESE!
Choose 3-4 types and a mix of soft and hard cheeses, all served at room temperature: Goat, Gruyere, Gorgonzola, Manchego, Burrata, Brie, Sharp Cheddar, White Cheddar, Havarti, Boursin
Think of creative ways to display your cheese:
* Cubed and piled up to add height and dimension
* Cut into thin, square slices and fanned out along the edge of the board
* Cut into thin, triangular slices and placed in a circle, with points facing in
* Served in large wedges for guests to cut themselves
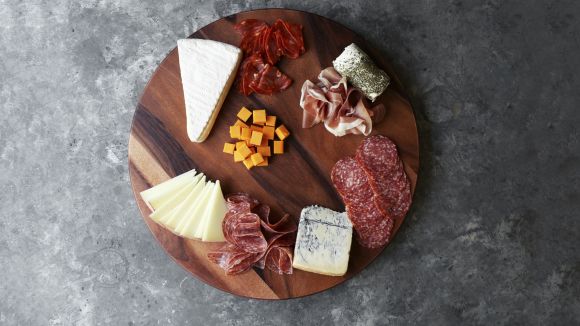
MEET ME AT THE MEAT AISLE
Choose 2-3 types, preferably pre-sliced: Salami, Prosciutto, Sopressata, Pepperoni, Bresaola, Pâté, Smoked Salmon
Think of creative ways to display your meats:
* Fold round, thin slices of meat in half, then fold again.
* Arrange to form a salami rose bouquet!
* Roll up slices of prosciutto and stack them on top of each other.
* Sopressata is usually cut into thick rounds, so fan these across the board.
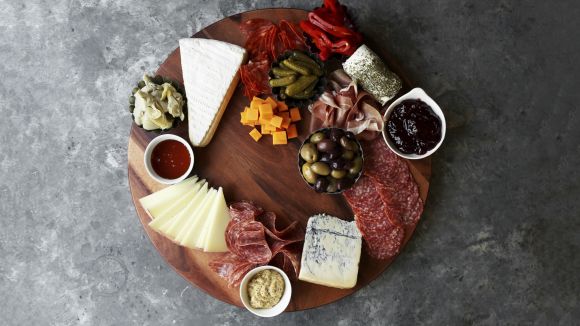
ADD CONDIMENTS + SIDEKICKS
You can’t have condiments without bowls! Invest in a few ramekins for displaying sauces, dips and salty, briny snacks that complement your meats and cheeses. Think about which of these options you might add: Honey, Whole Grain Mustard, Jam/Preserves, Infused Oil, Pickled Vegetables, Olives, Artichoke Hearts, Roasted Peppers, Cornichons and I personally like the idea of Sweet Chili Sauce, Hoisin Sauce, and Spicy Jams or Jellies
BRING THE COLOR WITH FRESH FRUIT
Try a mix of fresh fruits that are flavorful and abundant all year long (like Blueberries, Blackberries, Raspberries, Cantaloupe, Grapes) and dried fruit for options that are only available seasonally (like Mango, Apricots, Figs, Cranberries).
Creative ways to display fruit:
* Cut long, thin wedges of cantaloupe and fan them out or wrap thin slices of prosciutto around the middle.
* Choose whole dried figs and halve them to display their pretty seeds and centers. If fresh figs are in season, that is even better.
LET’S GET CRUNCHY.
Nuts and crackers or crisps are easy additions that require no extra prep work! Choose a few to round out your board: Pistachios, Almonds, Walnuts, Pecans, Cashews, Mini Toasts, Seeded Crackers, Cheese Twists, Water Crackers, Crispy Breadsticks, Pita Chips
* Use nuts to fill in any gaps in your board by stacking them in piles around other ingredients.
* Add extra height and interest by placing breadsticks or cheese twists upright and fanning crackers across the board in swirls.

FINISH WITH A LITTLE RAZZLE DAZZLE
When it comes to finishing touches, garnishes go a long way to add a hint of color and freshness. Try: Rosemary Sprigs, Basil Leaves, Mint Sprigs, Fresh or Dried Lavender
.jpg)
NO BOARD, NOT A PROBLEM
Don’t have a wooden board handy and prefer not to buy one? Feel free to use everyday kitchen tools like a pizza paddle, cast iron skillet or a sheet pan of any size to display the fruits of your labor (pun intended)!


 .
. 
 .
.