The Quiet Teacher

David Marty is a local to our area artist that teaches two-day classes in Edmonds at The Cole Gallery and sometimes once a week for six weeks on Bainbridge Island at The Winslow Art Center.  I have taken four classes from his so far with two in Edmonds and two on Bainbridge.  It is always interesting to see the level of the painters at the two different environments.  In Edmonds, there are usually a couple artists that are quite accomplished blended with more with little or no experience. I always learn at least one tidbit that helps to improve my own paintings.  Bainbridge classes are often comprised of many of the same artists that I have taken other classes with, and most all have been painting for several years.

Dave’s work is not quite as loose as some other Plein Artists, but it is always beautifully done. Coming from an illustrators background, his drawing is always “right-on'”. I have improved my drawing skills taking his classes and doing Urban Sketching with a group on Bainbridge Island.

David.jpeg

In David’s classes the entire class paints from the same photograph.  It is so interesting to watch throughout as the artists turn the photographs into beautiful paintings.  If you were to look at the finished pieces you realize just how differently people see. I love watching the artistic process as many of the pieces transform as they are painted.

In the classes on Bainbridge, we were always given a homework assignment to work on at home and bring for critique the following week. Painting Class 1.jpg

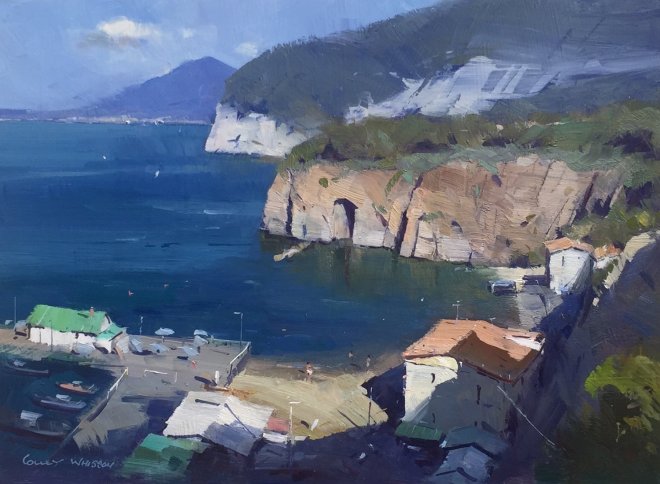
This was the first piece we worked on in class.  David would do a demo in the morning, then we all painted the rest of the afternoon and put up our work for a critique at the end of the session.  This class was to work on water receding in the distance.  I walked away content with this piece.

Painting Class 2.jpg

The second was a scene of a lake and the challenge was to show the lilies on the surface without making it look speckled.  The one above is mine.

Painting Class 3.jpg

We next worked on the reflections and lighting in this lake scene.

Painting Class 4.jpg

This was painted from a photo with a row of flowers.  I did not love the photo, so I reversed it in Photoshop and added a little girl picking the flowers in the front.  Once finished I thought and think it looks a bit trite.

Then we started painting a couple of roads, which I thought was great fun. Painting Class 5.jpg

I can always tell when I enjoy the topic we are painting, as I most likely will be happy with the result.


Painting Class 6.jpg

How to make a wall of trees look interesting was a challenge and it was a homework assignment.  I did feel this was successful as it has variety and keeps your interest.   David never says anything negative about your work, but makes quiet thoughtful suggestions on what might improve it.

Painting Class 7.jpg

Making rocks look like rocks is always a challenge and how to get the right color, so they look real but beautiful at the same time.  This was hard to capture, but I think it reads as rocks.

Painting Class 8.jpg

Another road with the task of making the road appear beautiful and interesting while receding believably into the background.

Painting Class 9.jpg

Painting the Night Scene of a city was fairly new to me.  I went with a little whimsy and fun and more abstract than real.  David liked how I did the lights in the background and thought he might change his to a little more like mine.  Boy, did that make me smile.


Painting Class 10.jpg

We all painted “The Red Barn”.  Growing up on a farm, I have always been attracted to barns and have painted several over my life as an artist.  This is a small 8 x 10 inch with a bad glare in the photo, but it was fun doing.

Painting Class 11.jpg

Homework assignment to paint clouds.  The tidbit I learned from this exercise is that clouds are always parallel to the earth at the bottom, so they are flat at the bottom.  Not my favorite painting, but it was a very simplistic photo.


Painting Class 12.jpg

The homework assignment was to capture the clouds in a painting from a photo of the clouds.  Mine was a good as anyone else in the class, but nothing I would try to sell.

Painting Class 13.jpg

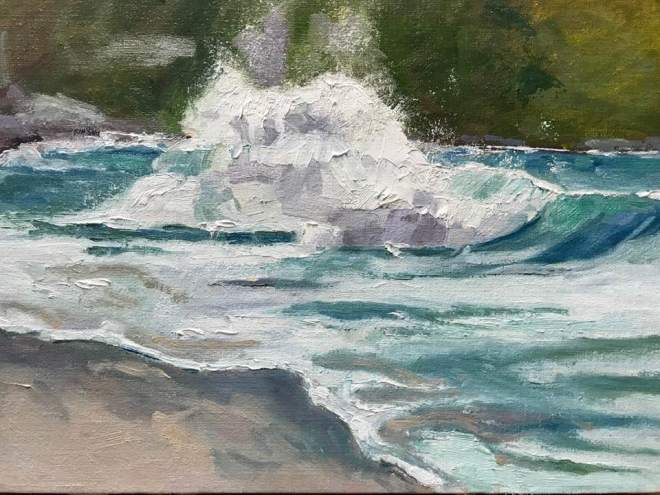
Everyone in the class liked this, but I sanded it down and repainted the canvas.  The wave looked more like a ledge than waves to me.

Painting Class 14.jpg

Beach walkers One.

Painting Class 15.jpg

Beach walkers Two.  I did not like the first rendition, so I painted it a second time.  Not sure that I like either of them.

Painting Class 16.jpg .                      Painting Class 17.jpg

From the sea, we moved to snow scenes.  I painted the one on the left in class, but it left me feeling unsuccessful, so I painted the one on the right.  It is a fun exercise to paint the same photo more than once and in slightly different styles.

Painting Class 18.jpg .                          Painting Class 19.jpg

With the next homework assignment of snow, I painted the first horizontally and the same scene vertically.  Working on composition helps you see the same thing in a different manner.

Port Gamble Diana.jpg

I brought in a photo I found online of Port Gamble, so we all had a take on this.  Port Gamble.jpg

In this case, I have the photo and thought it might be fun for you to see my translation of the photo.  I left out the tree in the foreground.  I do love the mist of the photo and feel at least I captured the essence of the mist.


Stream_0179.jpg

We were to paint this stream for homework.  Often when I look at a photo, I wonder what would be the best way to try to make this come to life.  When David showed his homework, it was mostly in browns, and I must admit that his rendition was more appealing than my greener version.

Stream.jpg

One of the students brought in a photo of Madronas on her property, and while they are lovely, it was a test of sorts to make an interesting painting.


1.jpg

Here is the photo. 2.jpg

First version

3.jpg

Finished version adding more darks.  I often do not go dark enough, so this was a great lesson in contrast.

The next class I took from David was at Cole Gallery and the class was about learning to paint moving water and how to draw your eye to the water.


1.jpg


I w2.jpg

I was pleased with the first painting but got my reflections off on the second.

3.jpg

This was the final painting in that particular class.  I do see water and color in a different way than before, and everyone in the class liked this painting.  I am not so sure that painting just water is my favorite.

Every time I do take a class with Dave, I learn at least one thing.  I enjoy watching how he holds his paintbrush to achieve the look he desires.  Every stroke is thought out and it important.  There is not scrubbing!

The Quiet Teacher

The Man From Australia

My last class, and probably the last one I will take for a while was from a well-known and respected artist from Australia.  Colley Whisson came to teach a four-day class at The Winslow Art Center and people from all over the country came to take the class.  He was funny and told great stories and talked a lot!  And talked a lot, but taught a lot too!  He paints a wide variety of topics and creates beautiful paintings from very simple photos.

The first day he did a demo for most of the morning and into the afternoon.  We were then given a photograph of the painting he had previously done from the same photo.

1.jpg

It was a very simple beach scene which did not seem exciting, but using the brush strokes he showed us and the limited palate, I was very pleased with my finished piece.  I think I was one of few in the class that he did not “touch” my canvas.  He made one suggestion but seemed to like my work.  (Yippee!!!)

2.jpg

Day two was an old cabin and it was interesting to see in a class of twelve or more that were no two even similar.  Mine featured the smallest cabin. Once again, he did not jump in and work on my painting and made one or two suggestions.  This is a small canvas and I liked using a larger brush than I had in the past.

3.jpg

Day three after the morning demo he set us free on copying his painting.  Other than saying I should move the chicken or the fountain, he seemed to like my work.  He did make one perspective change that was right-on.  I am getting used to using the bigger brush and like the look.  I would never have selected this view to paint, but I think it turned out pretty fair.

4.jpg

The fourth and last day we painted Plein Aire in the garden that used to belong to a friend of mine. I had not been in the garden since she sold the home after her parent’s passed away within months of each other.  It is a whimsical and beautifully lush garden.  As I walked in, I loved the contrast of the blue pot in the distance and the bright pink flowers close-up.  After I came home and looked at a photo I had taken and what I had painted I darkened the background for more contrast.  At his suggestion, I added more paint in the foreground and I think the effect is quite positive.

Colley is an excellent teacher that does beautiful paintings and makes his living selling his art in Australia.

1.jpg

I love the simplicity of his work along with the beautiful brushwork.  One thing he said that will now remain a constant in my work going forward is that you need to have a quiet space to contrast the brushwork.  Brilliant~

2.jpg

Simple composition with beautiful colors and brushwork. And I really do not like blue, but like the work overall.

3.jpg

I call this elegantly simple, but fascinating.


4.jpg

As you can see from the four examples I shared of his work, it is colorful, but controlled and beautifully painted.  I would definitely take his class another time. There were many little jewels that I learned from this master artist.

The Man From Australia

How to Completely Ruin a Recipe

GettyImages-200553944-001.jpg

Because at least we can learn something from all this.

KAYLEE HAMMONDS ~Author

This year, for the first (and hopefully last) time, my father volunteered to cook Easter dinner. I was a bit wary.

But hey—basically all he had to do was follow one recipe. Why? Because convenience is pretty much the only deal in the Hammonds household. That means the fewer home-cooked items, the better: This year’s dinner consisted of a Costco ham, Sister Schubert’s rolls, and a salad kit still in its bag.

That meant there wasn’t much left to tackle except for potato salad. (My Southern mother cannot conceive of ham served without potato salad.) We figured dad could handle it.

The recipe he chose involved grilled potatoes dressed with a pesto vinaigrette. I want to say he chose it because it sounded delicious and fresh, and something that his family would like to eat, but I’m pretty sure it’s because it was on the back of the bag of potatoes he’d picked up on the same Costco run that bore home our Easter ham.

Note: I love my parents. But cooking is not…how do I put this? It’s not their thing. My mother has been known to boil canned asparagus ahead of time, then freeze it, then thaw it out and serve it, in order to “save time.” Forget about the sad specter of tortured stalks that may at this moment be interred in the morgue of my mother’s freezer: I still don’t know what the H-word kind of time-saver that is.

Don’t even get me started on their rather cavalier attitude toward food safety and spoilage.

 There was much banging, messing about the kitchen, and my dad yelling at my mom (“Where are the pine nuts?! What are pine nuts?!”), while somehow managing to use pretty much ALL of the dishes.

Even so, I was excited about the salad: an easy pesto topping, something mild and springy to complement the nice, waxy bite of new potatoes. The recipe called for cooking the potatoes twice (first in the microwave, then on the grill), which I knew was intended to create a delicious crunchy/soft texture to hold the basil and olive oil, with nice ridges for rich, fat curls of Parmesan to land on.

A shower of toasted pine nuts would finish this deconstructed beauty of a spring celebration dish with an aromatic crunch and a not-small amount of panache.

Here is what her father served:

photo0.jpg

Let’s just take a look, shall we? This is a very brown, very soupy, somehow almost wilted pesto potato salad. My dad plopped a serving on my plate (I could hear the noise, but also sort of see it, like an onomatopoeia set off in a funny font in a comic book).

I picked up a forkful, and the first thing that hit me was the cheap, shambolic twinge of cut-price vinegar. Placing it in my mouth and chewing, I learned that some of the potatoes were slightly overcooked, while others were ice-cold, and the whole mouthful wore so many dried spices it reminded me, unkindly, of a girl I used to know in high school who preferred having makeup caked upon her face.

The texture was somehow both dry and mushy, while that vinegar taste hung over everything. This dish managed to defy any and all of the kitchen logic that I have come to know in my time working with food. It felt like laws of actual physics had been broken.

“Don’t blame me,” My dad said. “I followed the recipe.”

This, by the way, was the recipe:

photo0 (2).jpg

Not terribly simple, but not terribly complicated either.

So what went wrong? How did we get from a relatively innocuous, and tasty-looking potato salad dressed in a mild vinegary pesto, to a bowl of half raw, half mushy tubers lurking like stones in a swampy pile of desperation?

I decided to sit with my dad and try to go over how this thing had occurred, what we could learn from it, so we would never, ever, ever, ever have to do it again.

As we went over his culinary choices, it soon became clear that no decision he made was terribly unreasonable especially if taken one by one but put them all together and you get a pretty unholy mess. So here are the choices that my father made when following this recipe, how they went wrong, and the things that we can learn from them.

He halved the recipe

In itself, that seems perfectly reasonable, but he only cut out half of the potatoes, forgetting to reduce all of the other ingredients.

It may sound like a no-brainer, but once you’re in the kitchen and ingredients are flying, it can be easy to forget—especially if you’re making a recipe you’ve made before or often. This is a big one! If the ratio of ingredients is off, the whole dish can be thrown askew. You really have to make sure to alter the ENTIRE recipe to avert disaster.

He substituted dried herbs for fresh

Often, it’s just fine to use dried herbs where fresh is called for fresh herbs can be expensive and if you don’t cook a lot, it doesn’t make sense to spend the money.

The problem here is that Dad used a 1:1 quantity. If you’re going to sub in for fresh, you need to reduce the amount a three to one ratio is recommended.

Not only that, he subbed out the finely-minced basil that was called for, for a dried basil-oregano mixture sold to “flavor dipping oil for bread.” And he had dug it out of the back of the spice cabinet. Problems: it was the wrong combo of spices, the ratio was off, and given how old those spices probably were, just, like, ew! Clean out your spice cabinets!

He followed some directions exactly

This seems perfectly reasonable, but here we can blame the recipe, at least in part. The directions said to “halve or quarter” the potatoes, however, they varied wildly in size, so naturally, they cooked at different rates.

Uneven cooking resulted in a mix of raw and over-cooked potatoes not pleasant. Cutting them into like sizes would have helped them to cook more evenly. And saved at least a few tears.

This is an easy thing for a more experienced cook to figure out, but the recipe didn’t really explain how or why to avoid that. So it was part Dad-fail, part recipe-fail.

He made what seemed like a simple substitution

Pops assumed, perhaps understandably, that the inexpensive balsamic vinegar he had in the pantry could stand in for the golden balsamic in the recipe.

While you could probably replace the delicate flavor of a white balsamic with a mellow, aged balsamic, the cheap cooking swill he poured over the salad just wasn’t going to cut it.

Just as with potatoes, people, and buttercream frosting, all vinegars are not created equal. Take a minute to figure out what an ingredient brings to the recipe, in this case, a hint of acid without the mud-brown color.

He used Parmesan Cheese in a Can

We can maybe give him this one. After all, the recipe said “Parmesan” and the can said “Parmesan.” It’s been a years-long battle to get my parents to give up their can of powdered Parmesan. It ain’t happening. And, frankly, if all you’re trying to do is cut some of the acid in the jarred tomato sauce you just poured over spaghetti, it’s probably fine.

But putting shredded or shaved Parmesan over top of a salad is a lot different. And in a simple recipe like this, where every ingredient has to pull its weight, you can’t just dump cold, clumpy powder on and call it a day.

This resulted in an even more powdery potato texture (and it may have been in my head, but I swear I could taste the can). Real cheese is a whole different level of deliciousness. Use it sparingly, wisely, and you’ll find it’s well worth it.

He cut out a seemingly unimportant step to save time

The recipe called for tossing the warm potatoes in olive oil with vinegar, salt, and garlic and then putting the dish in the fridge to chill. Later, you were meant to add the fresh basil, pine nuts, and cheese.

This would have added a nice luxury finish to a simple side dish. But, because he didn’t give himself enough time, he did not chill the potatoes, which resulted in a warm, haphazardly-cooked heap soaking up the glop of powdered cheese, spice blend, and balsamic vinegar.

Sometimes there are extraneous steps to a recipe, sure. But not always. If you’ve got a recipe from a trusted source, examine the method carefully before you toss a step (or an ingredient) out the window. There’s probably a reason for it.

This is most likely why I don’t let my own husband in my kitchen.  If and when he goes shopping with me, he always thinks we should buy the cheapest of any said ingredient and that just does not work. 

How to Completely Ruin a Recipe

7 Design Tips For a Chef-Worthy Kitchen

This a great article from Dwell Magazine.

If you have serious culinary chops and take pride in preparing meals that wow your family and friends, keep these tips in mind when designing or renovating your kitchen.

If boiling eggs is not your forte, and you’d much rather eat out than experiment with new recipes, then a basic kitchen may be all you need. But if you’re serious about cooking and love nothing more than spending hours trying out new dishes that’ll impress guests at your next dinner party, then here are some elements to incorporate for a professional-grade kitchen.

1. The Magic Triangle

When planning the layout for your kitchen, refer to the “kitchen work triangle” with the cooking area, sink, and refrigerator at its three points. Though modern kitchens have evolved, and it is sometimes geometrically impossible to abide by this configuration (for example, in a single wall kitchen), the triangle is a good concept to keep in mind when designing to maximize functionality and ease of movement.

What they did not talk about is the new triangle, where the refrigerator is off to the side and a little out of the way.  There needs to be space across from it or beside it to put food when cooking, but it does not absolutely need to be part of the triangle anymore.  I love the cooktop part of my triangle, as I am working there, more than in the refrigerator. (unless I am really hungry)

7 Design Tips For a Chef-Worthy Kitchen - Photo 1 of 7 -


2. Two Sinks

Install two sinks so that you can clean fruits and vegetables in one while washing or stacking used pots and pans in the other. Ensure that the sink is deep and the faucets are high, so you don’t have to worry about water splashing onto the countertop as you strain your pasta or wash your dishes.

I have a little different take on this.  My utility room is adjacent to my kitchen, so I added a large stainless sink in there if I need a place for pots and pans.  If I am entertaining, I do not want my guests to see dirty pans in my kitchen, so this works great! 

7 Design Tips For a Chef-Worthy Kitchen - Photo 2 of 7 -

IMG_6990

3. Plenty of Durable Work Counters

As a home chef, you’ll be engaged in many food preparation tasks, so think about how to maximize counter space. Surface counters made of quartz, laminates, and solid surfaces are good choices for their durability, and antibacterial and anti-staining properties. Such surfaces are ideal for areas where you’ll do the most peeling, chopping, and blending.

Quartz is the new popular countertop and it is great, but if you select a plain one, be prepared to constantly be cleaning it, as it shows every spot.  I love a good granite that hides a little.  

7 Design Tips For a Chef-Worthy Kitchen - Photo 3 of 7 -

4. Built-In Appliances

Integrated appliances are your best bet for freeing up space, hiding unsightly electrical cords, and getting a clean, streamlined look. Wherever possible, choose built-in ovens, dishwashers, coffee machines, microwaves, and pullout fridges. This will help free up more counter space and make your kitchen look much more inviting.

I love making my dishwasher and refrigerator look like cabinets.  Now there are drawer refrigerators and freezers.  I hide my microwave and toaster oven in my pantry.  Clean is the new look!  

5. Good Lighting

A bright kitchen is not only healthier for your eyes, it makes preparing food safer and will probably put you in a cheerier mood. Locate your kitchen close to windows or incorporate skylights to increase the amount of natural light it receives. When choosing light fixtures, consider ambient lights, task lights, and accent lights. Use down lights to prevent glare and shadows, strip lighting under cabinets, and wide-rimmed pendant lights above the bar or island counter.

In my last home I had windows under the cabinets that looked out to the garden.  It had a wonderful effect.  We added another window when we remodeled last summer to take full advantage of our water view. 

7 Design Tips For a Chef-Worthy Kitchen - Photo 5 of 7 -

6. Ample and Intelligent Storage

Easy and intuitive access to a large pantry, spice racks, pots and pans, utensils, dinnerware, and cutlery can make all the difference when you’re preparing a feast for a large group. Consider storage systems which hold all your kitchen basics neatly and beautifully like a secret armoire.

I personally think that although this is “cool”, there are a lot better use of space, than hanging your utensils and knives.  One knife block on the counter is quite practical. 

7 Design Tips For a Chef-Worthy Kitchen - Photo 6 of 7 - On/Off Monoblock by Boffi

7. Wine Storage Facilities

Good food isn’t complete without great wine, so consider including wine storage facilities.  We love ours and use it every day.  

7 Design Tips For a Chef-Worthy Kitchen - Photo 7 of 7 - Perlick wine cooler


7 Design Tips For a Chef-Worthy Kitchen

Luxury Kitchens Sell the Home: Design Trends

 January 21, 2018 by 

Recently some 60,000+ people gathered in Orlando, FL at the Kitchen and Bath Industry Show (KBIS) hosted by the National Kitchen and Bath Association. It’s where companies that supply the kitchen and bath trade showcase their wares to interior designers, retailers and dealers, architects, builders, and remodelers. KBIS is part of Design and Construction Week with the NAHB International Builders’ Show.

Kitchens take center stage at KBIS and have been a focus of my research over the past year as well. I participated in a series of AuthLux day-long workshops on luxury kitchen and bath design sponsored by ROHL, the kitchen and bath luxury fixtures company, and part of the Fortune Brands family of companies.

An excerpted hour-long version of that full-day event was presented at this year’s KBIS, but I thought to share more insights from an AuthLux Summit panel discussion about designing the luxury kitchen of tomorrow today, hosted by Dallas-based interior designer Denise MaGaha.

The kitchen unlocks the value of a home

The kitchen is now the showpiece of the modern home. “The ultimate design statement of the home starts in the kitchen,” said MaGaha as she introduced the discussion focused on the three essential design elements for the modern kitchen – Cabinetry, Appliances and Water Appliances. “With the trend toward open-floor plans, the kitchen sets the stage for all the other design decisions in the home.”

The kitchen’s importance to the home owner is second to none. In today’s open-floor home designs, the kitchen takes center stage as the place where the family’s lifestyle starts. Kitchens are the most important selling point in home buyers’ decision, according to Realtor.com, and homes listed with “luxury kitchens” sell faster and command a higher selling price than similar-sized homes in the same ZIP code.

It’s no wonder then that interior designers find the greatest demand for their services in remodeling kitchens. Some 80% of home remodeling projects take place in the kitchen, according to the National Association of Home Builder’s Remodeling Market Index survey.

Here are some highlights from the panel discussion:

Upscale cabinets must be as beautiful on the inside as on the outside

Cabinets are the grounding element in the luxury kitchen, as all the other elements are mounted on them or placed within them. What’s more, they set the design style for the kitchen. “Today we see transitional and modern style with strong architectural references increasingly popular,” explained Jason Artus of Rutt HandCrafted Cabinetry, based in Lancaster County, PA.

“That’s also why we find European style frameless-constructed cabinets growing in demand,” Artus said. Frameless cabinets allow for additional storage with wider drawers and pullouts because they do not have a face frame attached to the front of the cabinet box and no center stile coming down in the middle of two cabinet doors. Frameless cabinets give a sleek, simple aesthetic that provide easier access to the items inside.

Another trend Artus sees in luxury cabinet choices is more drawers, instead of hinged door cabinets. “Additional drawers in the kitchen results in more accessible storage and organization, which is a top priority for clients to be sure that each and every kitchen item has its place.” And once those drawers or cabinets are opened, lights need to turn on automatically to guide the way.

And for the luxury home owner, the outside is just as important as the inside when it comes to cabinets. “It is expected that today’s upscale cabinetry look as beautiful on the interior as it does on the exterior,” Artus said, as he points to growing interest within the design community in white oak on cabinet interiors for “those looking for a lighter option to pair with darker exterior finishes.”

Luxury kitchens mean chef-quality appliances

While cabinetry provides the modern kitchen’s form, the appliances provide its function. And today that function is going more high-tech as smart technology is added into the mix. Selecting appliance brands that serve their function in style and are ahead of the curve in innovation is key.

Juanita Galliford, of Thermador, part of BSH Home Appliances Corporation, shared that her company has been at the forefront of kitchen innovation since its founding in 1916. It invented the wall oven and cooktop combination and was the first to introduce stainless steel. And in 1948 it brought the first professional-quality and performance ranges to the home owner, followed by the first self-cleaning oven in the 60s. When it comes to kitchen appliance innovation, she said, “Thermador has led while other brands have followed.”

On the cutting edge of cooking technology today is the steam/convection oven, Galliford explained. “The steam oven is one of the healthiest ways to cook a meal. Traditional ovens pull moisture out of the food as it cooks, while in a steam oven food is cooked in its own juices, enhancing flavor and retaining nutrients,” she said and told how it is also super-fast, allowing a 14 lb. turkey to cook in only 90 minutes.

And in the modern luxury kitchen, the refrigerator has taken on a new role as the “culinary preservation center,” noted Galliford. “Refrigerators are no longer just about preservation. Today’s homeowner wants personalization allowing them to customize the line up of cold storage combinations that give them exactly the cold storage solutions they desire.” So a modular concept in cold storage is required allowing the homeowner to pick fresh food store, freezer and wine storage combinations right for their needs.

From sink and faucet to water appliance

And perhaps the most overlooked, yet most critical function in the kitchen is the faucet and sink, which ROHL has redefined as the water appliance. “The most used appliance in the kitchen is actually the faucet/sink combination,” said Greg Rohl. “A family of four uses their water appliance 20-30 times a day. We encourage designers to think about reallocating budgets towards this most heavily used ‘appliance’ allowing clients to spend more for better quality and more attractive solutions.”

To discover the water appliance faucets, fixtures and fittings that meet 21st century needs in quality, style and function, ROHL canvases the world to find products that meet the luxury homeowners’ needs, like the innovative Pull-Out Kitchen Faucet, which founder Ken Rohl discovered in Europe in 1983 and which became the flagship product for the ROHL brand.

Through close collaborations with its worldwide partners, ROHL finds it critical to maintain authenticity in time-honored material and craft while adapting to modern needs. “We work closely with on-staff engineers and industrial designers to incorporate low-lead material requirements, meet California water-use and flow restrictions and IAPMO and EPA WaterSense criteria without compromise,” Rohl noted.

Designing the luxury kitchen of tomorrow today

Designing the kitchen of tomorrow today requires bringing many separate components provided by a variety of suppliers with unique expertise together into a cohesive kitchen package that combines beauty and function, efficiency and style. “Traditional kitchen configurations with upper and lower cabinets are being replaced by full-on kitchen islands – grounded by larger sinks, faucets and accompanying accessories,” Rohl explained. “Today, and in the future, the multi-function sink/faucet combination will continue to be the mainstay of the kitchen, flanked by the cooking and cold storage appliances, and installed with beautiful, architectural cabinetry that defines the kitchen’s style.”

The kitchen’s place of presence in the home is without doubt. Yet its form and function continues to evolve with technology, product and design innovations. Perhaps Christopher Peacock, a high-end cabinetry designer in Norwalk, CT expressed the evolution of the modern kitchen best: “It’s almost not worth calling it a kitchen anymore—it’s a living room that you can cook in.”

Luxury Kitchens Sell the Home: Design Trends

Millionaire’s Shortbread

This is a recipe straight from America’s Test Kitchen.  It has several steps, but the results are “Oh My Gosh” delicious!  I am taking a batch to our local fire department and a batch to a meeting Tuesday morning.  If you put them in a sealed container in the refrigerator they will last up to two weeks.  You really should try to make them!  Next time, I am going to add a little salt to the top, as I think that would be amazing!

msb

Millionaire’s Shortbread

WHY THIS RECIPE WORKS

Millionaire’s shortbread has a lot going for it: a crunchy shortbread base; a chewy, caramel-like filling; and a shiny, snappy chocolate top. The only thing that could make it better would be foolproof methods for producing all three layers. We started by making a quick shortbread with melted butter rather than pulling out the mixer or food processor. Sweetened condensed milk is important to the flavor of the filling, but it also makes the filling vulnerable to breaking because the whey proteins, crucial to keeping the mixture emulsified, have been damaged by heat both during processing and during the cooking of the filling. We added fresh cream to supply just enough whey to keep it together. Melting the chocolate very carefully so that it never got too hot and stirring in grated chocolate at the end created a smooth, firm top layer, which made a suitably elegant finish for this rich yet refined cookie.

MAKES 40 COOKIES

For a caramel filling with the right texture, monitor the temperature with an instant-read thermometer. We prefer Ghirardelli 60% Cacao Bittersweet Chocolate Premium Baking Bar for this recipe. Grating a portion of the chocolate is important for getting the chocolate to set properly; the small holes on a box grater work well for this task. Stir often while melting the chocolate and don’t overheat it.

INGREDIENTS

Crust

2 ½ cups (12 1/2 ounces) all-purpose flour
½ cup (3 1/2 ounces) granulated sugar
¾ teaspoon salt
16 tablespoons unsalted butter, melted

Filling

1 (14-ounce) can sweetened condensed milk
1 cup packed (7 ounces) brown sugar
½ cup heavy cream
½ cup corn syrup
8 tablespoons unsalted butter
½ teaspoon salt

Chocolate

8 ounces bittersweet chocolate (6 ounces chopped fine, 2 ounces grated)

1. FOR THE CRUST: Adjust oven rack to lower-middle position and heat oven to 350 degrees. Make foil sling for 13 by 9-inch baking pan by folding 2 long sheets of aluminum foil; first sheet should be 13 inches wide and second sheet should be 9 inches wide. Lay sheets of foil in pan perpendicular to each other, with extra foil hanging over edges of pan. Push foil into corners and up sides of pan, smoothing foil flush to pan. Combine flour, sugar, and salt in medium bowl. Add melted butter and stir with rubber spatula until flour is evenly moistened. Crumble dough evenly over bottom of prepared pan. Using your fingertips and palm of your hand, press and smooth dough into even thickness. Using fork, pierce dough at 1-inch intervals. Bake until light golden brown and firm to touch, 25 to 30 minutes. Transfer pan to wire rack. Using sturdy metal spatula, press on entire surface of warm crust to compress (this will make finished bars easier to cut). Let crust cool until it is just warm, at least 20 minutes.

2. FOR THE FILLING: Stir all ingredients together in large, heavy-bottomed saucepan. Cook over medium heat, stirring frequently, until mixture registers between 236 and 239 degrees (temperature will fluctuate), 16 to 20 minutes. Pour over crust and spread to even thickness (mixture will be very hot). Let cool completely, about 1 1/2 hours.

3. FOR THE CHOCOLATE: Microwave chopped chocolate in bowl at 50 percent power, stirring every 15 seconds, until melted but not much warmer than body temperature (check by holding in palm of your hand), 1 to 2 minutes. Add grated chocolate and stir until smooth, returning to microwave for no more than 5 seconds at a time to finish melting if necessary. Spread chocolate evenly over surface of filling. Refrigerate shortbread until chocolate is just set, about 10 minutes.

4. Using foil overhang, lift shortbread out of pan and transfer to cutting board; discard foil. Using serrated knife and gentle sawing motion, cut shortbread in half crosswise to create two 6 1/2 by 9-inch rectangles. Cut each rectangle in half to make four 3 1/2 by 9-inch strips. Cut each strip crosswise into 10 equal pieces. (Shortbread can be stored at room temperature, between layers of parchment, for up to 1 week.)


Millionaire’s Shortbread

The Christmas List

santa-claus-resting1024-716886

Do you remember being a child and sitting on Santa’s lap or writing him a letter telling him the wonderful things you would love for Christmas?

I still remember the year, when I was about ten years old and I wanted this beautiful doll for Christmas.  It was all I wanted.  It was similar to the American Girl Dolls we have today.  I pined about this doll.  It was one the years we drove from our farm in northern California to West Hollywood, to the home of my father’s sister and her husband.  In my eyes, with a view of the city and a swimming pool, they had everything.  My cousin even had a four poster white bed, something I dreamed about for years.  It was a long drive, and my father put all of our presents on the top of the family car in boxes. I have never forgotten those windblown beat-up gifts being put under the prettiest tree I had ever seen.  I was sad to my toes to see our pathetic gifts under their perfect tree with all their big beautiful gifts beautifully wrapped. Christmas morning came and I knew my main gift was the wrong shape to be that doll I coveted. My parents had given me a big pink fuzzy bathrobe.  I opened the present and just started crying.  No one knew what to do.  To this day, my gifts are perfectly wrapped and NO ONE ever gets a bathrobe for Christmas.

When I was younger, in my twenty and thirties I always just wanted something special for Christmas and I was very lucky that happened for many years. My sons never lacked for gifts and got everything on the list that they gave me.  I never had a list after that Christmas at my aunt’s house.  I never wanted to be disappointed again.  If you don’t have a list, you can’t be sad when don’t get anything from that list.

At my current stage of life, if I want something I buy it.  I don’t need or want more jewelry, as it will just be a question of what happens to it when….  (Granddaughter Claire gets it all) As my sons grew older and didn’t really want much for Christmas, I started giving them memories.  I took them hot-air ballooning over Del Mar, California. We had a very wonderful dinner at the Hotel Del Coronado for New Years Eve. We skied at Whistler, Mt. Hood, Mt. Bachelor, Mission Ridge and hit every ski resort locally.  We ice skated, roller bladed and ate at a lot of wonderful restaurants.  I attempted camping only once and failed miserably, but it was all about making memories. We cooked together and always had a candlelit dinner together on Sunday evenings. I think it was a good thing to do.

As I said now I don’t want “things” as gifts. If you were to ask me today what I really wanted, I might tell you that I would like the screen in the kitchen replaced where the paint drop made a hole when I tried to clean it. I would love the beautiful aqua fountain between my house and my garage to be working again, as I loved coming home to the sound of it. There is a tiny hole in the grout in the living room and I think I will just fill it in today myself, as it bothers me every time I vacuum and with Frostyman the Cat I vacuum each and every day.  I would love to see the beautiful light fixture over my desk fully-functioning again.  Four of the lights just quit working and it has to be taken apart to fix. So maybe I would just like a card that says these things will be done.  That would make me so very happy. I would love to see the garage clean and fireplace on the back deck, so I can use my TRX in the garage and I would love to see the inside of garage painted and clean, but I think that is my summer project. (too cold right now)

If you ask me about things I love, I would share that I love the snow globes I have collected for years and if you could find more from Neiman Marcus, that would make me be very appreciative of you knowing something I care about.  I may just leave them out all year and collect some from places I loved visiting.  I think we need to have things in our homes that we love to look at and that make us smile. When I had a scavenger for my granddaughter’s seventh birthday last week, I realized I have some pretty fun stuff that I have collected and loved over the years.

Mostly I would love to spend the holidays with all my sons and their families and that just does not seem to happen any more. Luckily one son lives fairly close, so I do get to see him more. So maybe I will just go have a facial or massage, take a trip, go to the movies I want to see, read more books and spend more time in my studio sewing or painting. We all just need to take the time to do the things we love.  Oh and of course I always find joy in cooking.  Now I just need to find more people that want to eat what I cook.

What makes you happiest at Christmas?  Is it the decorations, the food, the family or the camaraderie of friends getting together.  When I was younger, Christmas always made me so very happy, but as I grow older and my children have lives of their own I do not look forward to the holidays nearly as much.


The Christmas List

IS THERE ANYTHING CLASSIC IN A CURRENT TREND?

Every year new trends are announced and we respond to them in some manner. Just how important they should be in your lifestyle is usually at question. “Consumers always want to see something new, but they want that with something familiar”, according to Leatrice Eiseman –executive director of the Pantone Color institute.

There are some that think it is important to have the current trends in design be a part of your home and others that really don’t care. What is most important is how do you bring your home environment current so you enjoy living in it. If a trend seems terrible to you, then bringing it into your home is not the best idea for you.

If you want to add the latest color trends in your home every year, there are many ways to do it and not spend a fortune. Remember when you buy a trendy piece of furniture, you are most likely going to have to live with it a long time. Accents added in the latest and greatest color and/patterns are not terribly expensive to replace when you tire of the trend, as most of us do after a while. If you love a trendy new color, throw pillows or vases might be an easy solution and not cost a fortune. I love that we now have Home Goods, TJMaxx, Marshalls and Ross as great sources for buying easily replaceable accessories. Little or no guilt when you spend $20.00 on a accent rather that the $200 a custom-made designer pillow might cost.

That beige or gray neutral sofa may look dull on display at your local vendor, but it will go with everything you put on it over the years. Look for simple classic lines and you will not grow tired of your furniture. Look for fun splashes of color to liven it up every year or every season. When you shop for your “big” items, if there is even a tiny doubt you will not love it in five or ten years, then it is probably not a good choice.

Clean lines are always in style. Ornate looked great in the Victorian era and if you have a few  family pieces, they can look fantastic in a very modern interior, as a lovely focal point, but a whole room of them might be kind of depressing. Think simple and you won’t get tired of it.

If you go neutral in most of your home, you won’t have to change much often. Paint a wall one of the newly trendy colors and love it for a while. Paint is relatively cheap and easy to replace. Add a couple pillows in a coordinating color and you are looking trendy. Add flowers in the new colors (if appropriate) and your friends will think you know what you are doing.

Texture is another way to add interest to a neutral interior. Trends in texture do change, but they seem to have a little more longevity. A cowhide rug may not go out of style, but florals and certain print designs don’t say in fashion for long.

Avoid trendy when it comes to big signature pieces, as you will want ones that meet the test of time. Dining room tables, beds, kitchen cabinets, flooring and architectural details are not the place to be trendy, as they are all expensive to replace. Pick ones you love when you see them. Pay a little more and get something that is made well with great lines.

One of the most important things to remember about trends: if you don’t like it when you first see it, you most likely never will. That being said, there are some trends that never go out of style. Tasteful animal prints are always a fun look in small doses. Some say granite in the kitchen is on the way out, but I am not sure I am totally on track with that one. Beautiful classic

oriental rugs always add interest to a room and I personally think some of the Mid-Century modern furniture will never go out of style. Mid-Century modern seems to a “trend” coming back to be popular, but I think it never went away as it has always been classic, workable and beautiful. From a designer point of view, they have never made anything more comfortable and beautiful than an Eames Lounge chair or as elegant as a steel and glass Platner coffee table or side table. If I could afford four Mies van der Rohe’s Barcelona chairs from 1929 in my living room, I would be forever happy.

Balance may be one of the key words in bringing trendiness into your home or office environment. Function of the piece should be an important part of your decision making when buying long-term pieces. Maybe this year the glass dining table is popular. You buy one, then you remember you sometimes have twenty for holiday dinners and the glass table does not expand. That brings the word “versatility” to mind. Can you use that trendy item some other way in the future? Can you paint it? Can you change it?

I have a beautiful old-world Baker round dining table I bought twenty years ago. When I got tired of the wood look, I painted it black and put a dark wax finish on it. I paired it with see through ghost chairs, so it now looks up to date. It expands and I have seated twelve for dinner. Think about what you have and how you can change it, to make it more current. Good lines always look good.

Timeless design always doesn’t pull from trends and is quietly understated, simple and sophisticated. Let go of the idea that your taste will never change. As we go through life our taste changes. What we should strive to do is to find something that is highly functional, not bland, while being subtle, adaptable and will pass the test of time.

If you are having a hard time finding the right balance in your home, it might be the time to hire a professional interior designer. I would love to help you make your home your living paradise. It is what we designers do.

IS THERE ANYTHING CLASSIC IN A CURRENT TREND?

Just a nice Winter Meal

Short ribs

My husband loves “meat & potatoes”, so to make him happy I cook a lot more meat dishes than I would really like to eat.  I could eat fish and chicken seven days a week, but I do have to admit this meat dish was pretty good.  I would add a little more beef stock than the recipe suggested and maybe add a little white wine to tenderize the meat.  The recipe came from Cooking Light Magazine.  I would not really consider this a “light” dinner, but it was tasty.  The recipe was by Marianne Williams.

Oh, and do NOT touch your eye after chopping up the chili; as it is not a fun moment. 

Prep Time
20 Mins
Total Time
8 Hours 20 Mins
Yield
Serves 8 (serving size: 1 short rib and about 1/3 cup rice mixture)

The slow cooker makes a masterpiece of beef short ribs as the meat becomes buttery tender and the cooking liquid reduces to a spicy, deeply savory sauce. Sake, a dry rice wine, and mirin, a stronger, sweeter rice wine, balance each other here (the alcohol will cook off as the dish simmers). Both are available at most grocery stores. Spicy, tangy kimchi, or Korean-style fermented cabbage, adds heat and complexity to the dish.

Just a nice Winter Meal

Onions ~ Onions ~ Onions ~ Onions

I love cooking and if you follow my blog you get that right away.  As I grow wiser in my cooking skills (have more time to cook) I am learning the subtilties of flavor. Why use an onion when you could use a leek.  Why shallots and not onions.  Why a yellow onion instead of a sweet Walla Walla onion.  It is important to know the differences and why you use one in one place and another in another dish.  What onions taste good raw and which ones may not so much. So I started doing a little onion research, or why do some make you cry and others do not.

Yellow Onions

Yellow onions, the most popular cooking onions add excellent flavor to most stews, soups, and meat dishes. In fact, typically when a cooked recipe calls for onion, yellow onion is a safe way to go. Yellow onions have a yellow-brown papery skin on the outside and a white flesh.

It is to know if someone is cooking with yellow onion because my eyes start to water due to effect of higher sulfur content. The yellow onion has a high sulfur content, so it has a more pungent flavor and smell, which typically makes it too strong to eat raw unless there are other ingredients to counter-balance the flavor.  I use yellow onions in stews, soups, sautéed dishes, and shish kabobs. They have excellent flavor when cooked, and I rarely cook without them.

Yellow Onions

White Onions

White onions have an all-white skin and an all-white flesh. They have a slightly milder flavor than the yellow onion and are a great substitute if you’re in need of an onion flavor, but don’t want it to be too powerful. White onions are commonly used in Mexican cuisines. I don’t know if I have ever used them and I finally now know when to substitute.

White Onions

Red Onions

Red onions are used more in non-cooked dishes, such as salads and sandwiches. Of the different colored onions, the red onion is the most mild, sweet onion. Red onions have the purplish-red skin which color is layered though it’s white flesh. I personally don’t like to cook heated dishes with red onion because it doesn’t produce enough onion flavor to enhance my meal. Keep in mind that cooking an onion diminishes its flavor, but increases the flavor of the food around it. I love cooked red onions caramelized for hamburgers.

Red Onions

Sweet Onions
Sweet onions, sometimes referred to as “short day” onions, because their growing season occurs during the fall and winter with harvest usually in spring /summer, are fresh onions, picked and cured for a short time, then rushed to market. Storage onions, or regular globe onions, are harvested in late summer and fall, stored in warehouses and delivered to markets throughout most of the year.

Although there is no official industry standard, it is generally accepted that an onion should contain at least 6% sugar to be in the “sweet” category. Some sweet onions, like the OsoSweet, have recorded sugar levels of up to 15%. Storage onions usually range from 3%-5% in sugar content.


Unlike sweet onions, regular onions have high levels of sulfur compounds. It’s the pyruvic acid in the sulfur that causes tears, harshness, and indigestion. That’s why great sweet onions are always grown in soil with low amounts of sulfur. Typically, sweet onions have pyruvic acid levels that measure below 5%; storage onions usually run 10%-13%. Because a sweet onion is also a fresh onion it is very high in water content, which further dilutes the effect of the sulfur and increases mildness.


The best sweet onions deliver a burst of sweetness when bitten into, are incredibly mild, with very little if any sharpness, and have a subtle, fruity flavor. They should still taste like an onion, but be much sweeter and milder.


Sweet onions have a thinner, lighter color skin than storage onions and tend to be more fragile. Signs in produce sections usually differentiate between sweet onions and storage onions. Most producers also put stickers on each individual onion, such as “Texas 1015 SuperSweet,” “Sweet Imperials,” etc. Another indication is price – sweet onions are a premium product that can range anywhere from 79 cents a pound and up.


Although it seems like sweet onions are a relatively new item, they were first introduced to America around the turn of the century when a retired French soldier brought some onion seeds from Corsica to the Walla Walla region of the Pacific Northwest. But it wasn’t until the savvy farmers in Georgia realized what a special thing they had in the Vidalia onion and began spreading the news far and wide that the sweet onion finally got the attention it deserves.


Once considered just a spring/summer treat, these sweet orbs are now available year-round. Vidalias, a springtime delight, now show up in markets until late fall, thanks to controlled-atmosphere storage. And now with the development of the OsoSweet onion, we can enjoy mild, sweet onions all winter long.

Onion vs Shallot

In the culinary world, you may come across two ingredients that may somehow confuse you, the onion and the shallot. Some people may consider them very similar as they often substitute one with the other. However, established culinary experts know the distinct tastes and texture they provide in every cuisine. So, how different are they from each other? Let’s break it down.

Onion is a general term used to refer plants in the genus Allium. However onions, as a common name, usually refers to specific specie, the “garden or bulb onion” (Allium cepa).

The bulb onion is a popular kitchen ingredient that is used worldwide. As the name implies, it is bulb shaped but sometimes flat almost disc shaped. Its skin colors are white, yellow or red. The taste depends entirely on the variety. It can sharp, spicy, tangy and pungent or mild and sweet.

Onions are grown from seed or commonly, from sets. They eventually grow into a large single bulb per plant. Onions are rather difficult to propagate since there are special processes involved to produce a durable bulb.

A shallot, on the other hand, is referred to two different Allium species the Allium oschaninii and the Allium cepa var. aggregatum or Allium ascalonicum.

The Allium oschaninii is the French grey challot or griselle. This specie is considered as the “true shallot” but still cannot beat the Allium cepa variety in terms of global popularity. The latter is widely accepted as the shallot.

Shallots, the Allium ascalonicum variety — grow in clusters, just like those of garlic, where separate bulbs are attached at the base. However, unlike garlic, the individual bulbs are not encircled together by a common membrane. They are closely related to multiplier onions and are rather easy to grow as they require little soil preparation. The plants seldom form seed, so they’re usually grown from cloves ñ they are vegetatively multiplied.

They look like elongated onions and the skin is colored copper, reddish, or gray. Shallots have a mild taste which is a mix of sweet onion flavor and a touch of garlic.

Summary:
1.  Shallots grow as a cluster of bulbs from a single planted bulb similar to garlic while onions grow as a single big bulb per plant.
2. Shallots are a lot smaller compared to onions.
3. The common onion is Allium cepa while the commonly accepted shallot is Allium ascalonicum.
4. The shallot may resemble the taste of onion but milder and sweeter in flavor. Distinctively from onions, shallot may taste with a hint of garlic.
5. Onions are more difficult to grow than shallots.
6. Onions are seed-propagated, whereas shallots are vegetatively multiplied.
7. Onions are almost disc-shaped bulbs while shallots can appear like elongated onions.

How to Pick a Good Onion

In general, when you’re choosing onions in the store, the best ones will be firm, have a crackly outer skin, and have a mild scent. If their scent is overwhelming it’s a good sign the onion is starting to spoil. Avoid onions with dark spots or mold as well, though every once in a while I’ll still purchase those if I’m going to use them right away (I guess that’s my altruistic side coming out–take one for the team, you know). On another note, onions tend to store better in a slightly cooler, darker area, although the fridge is not recommended. The onion smell has a tendency to spoil the flavor of other foods in the fridge.

Here is a great chart to help you decide what to use.  Oh wait, where do Leeks fit in?

Screen Shot 2017-11-16 at 5.01.27 PM

Leeks vs Green Onions 

leeks Leeks

Screen Shot 2017-11-16 at 6.42.09 PM

Onion is one vegetable that is an integral part of kitchens around the world. It is used both as a vegetable and also eaten raw in the form of salad. It has a pungent smell but used in cooking, to add to the flavor and aroma of many different types of food recipes. There are many different types of onions with green onions being very popular in European and Chinese cuisine. There is another variety called leek that confuses many because of its similarities with green onions. However, despite similarities, there are subtle differences also that prevent leeks being substituted with onions in many recipes.

Onion

Onion is a flowering plant belonging to the genus Allium that also contains garlic and leek. It is the edible bulb of onion plant that is used universally in cooking or as raw vegetable. Even the stem and the leaves of onion plant are used in cooking in many parts of the world. The most common and popular type of onion around the world is the red onion that is also called common onion. Onion bulb is known for its health benefits to human beings. It is anti-inflammatory, reduces cholesterol levels, and also has antioxidant properties. However, most people love it to consume onion bulb because of its taste and aroma. The paste of onion bulbs is used to thicken curries and to add to the flavor. The characteristic feature of red onion is its multilayered structure. It has a pungent smell and brings tears to the eyes of a person who cuts it into pieces.

One of the varieties of onions is green onion or scallion that is known by different names such as spring onions, baby onions, salad onions, gibbons, etc. These varieties have smaller bulbs that are not fully developed. The leaves are hollow from inside and are edible. These varieties are milder than red onions and used cooked as well as raw.

Leek

Leek is a plant that belongs to the family of genus Allium. It is a symbol of Wales and Welsh leeks are very popular all over Europe for their taste and aroma. Leek is a plant that does not produce a strong bulb and has long leaves that are cylindrical and crunchy to eat. People mistakenly refer to the heath of leaves as the stem of this plant. The part of these leaves that is just above the root or the bulb and is light green in color is edible though people also consume the hard and dark green part of the leaves of leeks too.


Leeks vs Green Onions

• Both green onions, as well as leeks, are part of the same onion family, but leeks are larger and are milder in taste and aroma than green onions.

• It is harder to cook the leaves of leeks while green onion leaves can be easily cooked.

• Leeks look like oversized green onions.

• Green onion leaves can be eaten raw, but leeks require to be cooked before consumption.

• One has to blanch the leaves of leeks as mud and dirt hides in between its leaves.

• It is the light green part of the leaves of leeks that are edible.

• Welsh leeks are very popular, and the vegetable is a national symbol of the country.

So did this help or are you now totally confused.

Once again ~ Happy Cooking!~

Onions ~ Onions ~ Onions ~ Onions