IS THERE ANYTHING CLASSIC IN A CURRENT TREND?

Every year new trends are announced and we respond to them in some manner. Just how important they should be in your lifestyle is usually at question. “Consumers always want to see something new, but they want that with something familiar”, according to Leatrice Eiseman –executive director of the Pantone Color institute.

There are some that think it is important to have the current trends in design be a part of your home and others that really don’t care. What is most important is how do you bring your home environment current so you enjoy living in it. If a trend seems terrible to you, then bringing it into your home is not the best idea for you.

If you want to add the latest color trends in your home every year, there are many ways to do it and not spend a fortune. Remember when you buy a trendy piece of furniture, you are most likely going to have to live with it a long time. Accents added in the latest and greatest color and/patterns are not terribly expensive to replace when you tire of the trend, as most of us do after a while. If you love a trendy new color, throw pillows or vases might be an easy solution and not cost a fortune. I love that we now have Home Goods, TJMaxx, Marshalls and Ross as great sources for buying easily replaceable accessories. Little or no guilt when you spend $20.00 on a accent rather that the $200 a custom-made designer pillow might cost.

That beige or gray neutral sofa may look dull on display at your local vendor, but it will go with everything you put on it over the years. Look for simple classic lines and you will not grow tired of your furniture. Look for fun splashes of color to liven it up every year or every season. When you shop for your “big” items, if there is even a tiny doubt you will not love it in five or ten years, then it is probably not a good choice.

Clean lines are always in style. Ornate looked great in the Victorian era and if you have a few  family pieces, they can look fantastic in a very modern interior, as a lovely focal point, but a whole room of them might be kind of depressing. Think simple and you won’t get tired of it.

If you go neutral in most of your home, you won’t have to change much often. Paint a wall one of the newly trendy colors and love it for a while. Paint is relatively cheap and easy to replace. Add a couple pillows in a coordinating color and you are looking trendy. Add flowers in the new colors (if appropriate) and your friends will think you know what you are doing.

Texture is another way to add interest to a neutral interior. Trends in texture do change, but they seem to have a little more longevity. A cowhide rug may not go out of style, but florals and certain print designs don’t say in fashion for long.

Avoid trendy when it comes to big signature pieces, as you will want ones that meet the test of time. Dining room tables, beds, kitchen cabinets, flooring and architectural details are not the place to be trendy, as they are all expensive to replace. Pick ones you love when you see them. Pay a little more and get something that is made well with great lines.

One of the most important things to remember about trends: if you don’t like it when you first see it, you most likely never will. That being said, there are some trends that never go out of style. Tasteful animal prints are always a fun look in small doses. Some say granite in the kitchen is on the way out, but I am not sure I am totally on track with that one. Beautiful classic

oriental rugs always add interest to a room and I personally think some of the Mid-Century modern furniture will never go out of style. Mid-Century modern seems to a “trend” coming back to be popular, but I think it never went away as it has always been classic, workable and beautiful. From a designer point of view, they have never made anything more comfortable and beautiful than an Eames Lounge chair or as elegant as a steel and glass Platner coffee table or side table. If I could afford four Mies van der Rohe’s Barcelona chairs from 1929 in my living room, I would be forever happy.

Balance may be one of the key words in bringing trendiness into your home or office environment. Function of the piece should be an important part of your decision making when buying long-term pieces. Maybe this year the glass dining table is popular. You buy one, then you remember you sometimes have twenty for holiday dinners and the glass table does not expand. That brings the word “versatility” to mind. Can you use that trendy item some other way in the future? Can you paint it? Can you change it?

I have a beautiful old-world Baker round dining table I bought twenty years ago. When I got tired of the wood look, I painted it black and put a dark wax finish on it. I paired it with see through ghost chairs, so it now looks up to date. It expands and I have seated twelve for dinner. Think about what you have and how you can change it, to make it more current. Good lines always look good.

Timeless design always doesn’t pull from trends and is quietly understated, simple and sophisticated. Let go of the idea that your taste will never change. As we go through life our taste changes. What we should strive to do is to find something that is highly functional, not bland, while being subtle, adaptable and will pass the test of time.

If you are having a hard time finding the right balance in your home, it might be the time to hire a professional interior designer. I would love to help you make your home your living paradise. It is what we designers do.

IS THERE ANYTHING CLASSIC IN A CURRENT TREND?

Just a nice Winter Meal

Short ribs

My husband loves “meat & potatoes”, so to make him happy I cook a lot more meat dishes than I would really like to eat.  I could eat fish and chicken seven days a week, but I do have to admit this meat dish was pretty good.  I would add a little more beef stock than the recipe suggested and maybe add a little white wine to tenderize the meat.  The recipe came from Cooking Light Magazine.  I would not really consider this a “light” dinner, but it was tasty.  The recipe was by Marianne Williams.

Oh, and do NOT touch your eye after chopping up the chili; as it is not a fun moment. 

Prep Time
20 Mins
Total Time
8 Hours 20 Mins
Yield
Serves 8 (serving size: 1 short rib and about 1/3 cup rice mixture)

The slow cooker makes a masterpiece of beef short ribs as the meat becomes buttery tender and the cooking liquid reduces to a spicy, deeply savory sauce. Sake, a dry rice wine, and mirin, a stronger, sweeter rice wine, balance each other here (the alcohol will cook off as the dish simmers). Both are available at most grocery stores. Spicy, tangy kimchi, or Korean-style fermented cabbage, adds heat and complexity to the dish.

Just a nice Winter Meal

Onions ~ Onions ~ Onions ~ Onions

I love cooking and if you follow my blog you get that right away.  As I grow wiser in my cooking skills (have more time to cook) I am learning the subtilties of flavor. Why use an onion when you could use a leek.  Why shallots and not onions.  Why a yellow onion instead of a sweet Walla Walla onion.  It is important to know the differences and why you use one in one place and another in another dish.  What onions taste good raw and which ones may not so much. So I started doing a little onion research, or why do some make you cry and others do not.

Yellow Onions

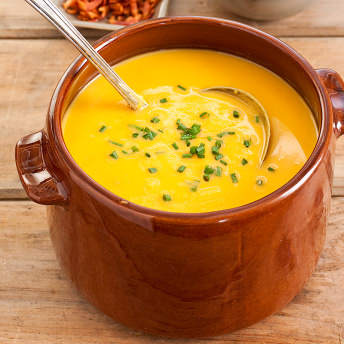
Yellow onions, the most popular cooking onions add excellent flavor to most stews, soups, and meat dishes. In fact, typically when a cooked recipe calls for onion, yellow onion is a safe way to go. Yellow onions have a yellow-brown papery skin on the outside and a white flesh.

It is to know if someone is cooking with yellow onion because my eyes start to water due to effect of higher sulfur content. The yellow onion has a high sulfur content, so it has a more pungent flavor and smell, which typically makes it too strong to eat raw unless there are other ingredients to counter-balance the flavor.  I use yellow onions in stews, soups, sautéed dishes, and shish kabobs. They have excellent flavor when cooked, and I rarely cook without them.

Yellow Onions

White Onions

White onions have an all-white skin and an all-white flesh. They have a slightly milder flavor than the yellow onion and are a great substitute if you’re in need of an onion flavor, but don’t want it to be too powerful. White onions are commonly used in Mexican cuisines. I don’t know if I have ever used them and I finally now know when to substitute.

White Onions

Red Onions

Red onions are used more in non-cooked dishes, such as salads and sandwiches. Of the different colored onions, the red onion is the most mild, sweet onion. Red onions have the purplish-red skin which color is layered though it’s white flesh. I personally don’t like to cook heated dishes with red onion because it doesn’t produce enough onion flavor to enhance my meal. Keep in mind that cooking an onion diminishes its flavor, but increases the flavor of the food around it. I love cooked red onions caramelized for hamburgers.

Red Onions

Sweet Onions
Sweet onions, sometimes referred to as “short day” onions, because their growing season occurs during the fall and winter with harvest usually in spring /summer, are fresh onions, picked and cured for a short time, then rushed to market. Storage onions, or regular globe onions, are harvested in late summer and fall, stored in warehouses and delivered to markets throughout most of the year.

Although there is no official industry standard, it is generally accepted that an onion should contain at least 6% sugar to be in the “sweet” category. Some sweet onions, like the OsoSweet, have recorded sugar levels of up to 15%. Storage onions usually range from 3%-5% in sugar content.


Unlike sweet onions, regular onions have high levels of sulfur compounds. It’s the pyruvic acid in the sulfur that causes tears, harshness, and indigestion. That’s why great sweet onions are always grown in soil with low amounts of sulfur. Typically, sweet onions have pyruvic acid levels that measure below 5%; storage onions usually run 10%-13%. Because a sweet onion is also a fresh onion it is very high in water content, which further dilutes the effect of the sulfur and increases mildness.


The best sweet onions deliver a burst of sweetness when bitten into, are incredibly mild, with very little if any sharpness, and have a subtle, fruity flavor. They should still taste like an onion, but be much sweeter and milder.


Sweet onions have a thinner, lighter color skin than storage onions and tend to be more fragile. Signs in produce sections usually differentiate between sweet onions and storage onions. Most producers also put stickers on each individual onion, such as “Texas 1015 SuperSweet,” “Sweet Imperials,” etc. Another indication is price – sweet onions are a premium product that can range anywhere from 79 cents a pound and up.


Although it seems like sweet onions are a relatively new item, they were first introduced to America around the turn of the century when a retired French soldier brought some onion seeds from Corsica to the Walla Walla region of the Pacific Northwest. But it wasn’t until the savvy farmers in Georgia realized what a special thing they had in the Vidalia onion and began spreading the news far and wide that the sweet onion finally got the attention it deserves.


Once considered just a spring/summer treat, these sweet orbs are now available year-round. Vidalias, a springtime delight, now show up in markets until late fall, thanks to controlled-atmosphere storage. And now with the development of the OsoSweet onion, we can enjoy mild, sweet onions all winter long.

Onion vs Shallot

In the culinary world, you may come across two ingredients that may somehow confuse you, the onion and the shallot. Some people may consider them very similar as they often substitute one with the other. However, established culinary experts know the distinct tastes and texture they provide in every cuisine. So, how different are they from each other? Let’s break it down.

Onion is a general term used to refer plants in the genus Allium. However onions, as a common name, usually refers to specific specie, the “garden or bulb onion” (Allium cepa).

The bulb onion is a popular kitchen ingredient that is used worldwide. As the name implies, it is bulb shaped but sometimes flat almost disc shaped. Its skin colors are white, yellow or red. The taste depends entirely on the variety. It can sharp, spicy, tangy and pungent or mild and sweet.

Onions are grown from seed or commonly, from sets. They eventually grow into a large single bulb per plant. Onions are rather difficult to propagate since there are special processes involved to produce a durable bulb.

A shallot, on the other hand, is referred to two different Allium species the Allium oschaninii and the Allium cepa var. aggregatum or Allium ascalonicum.

The Allium oschaninii is the French grey challot or griselle. This specie is considered as the “true shallot” but still cannot beat the Allium cepa variety in terms of global popularity. The latter is widely accepted as the shallot.

Shallots, the Allium ascalonicum variety — grow in clusters, just like those of garlic, where separate bulbs are attached at the base. However, unlike garlic, the individual bulbs are not encircled together by a common membrane. They are closely related to multiplier onions and are rather easy to grow as they require little soil preparation. The plants seldom form seed, so they’re usually grown from cloves ñ they are vegetatively multiplied.

They look like elongated onions and the skin is colored copper, reddish, or gray. Shallots have a mild taste which is a mix of sweet onion flavor and a touch of garlic.

Summary:
1.  Shallots grow as a cluster of bulbs from a single planted bulb similar to garlic while onions grow as a single big bulb per plant.
2. Shallots are a lot smaller compared to onions.
3. The common onion is Allium cepa while the commonly accepted shallot is Allium ascalonicum.
4. The shallot may resemble the taste of onion but milder and sweeter in flavor. Distinctively from onions, shallot may taste with a hint of garlic.
5. Onions are more difficult to grow than shallots.
6. Onions are seed-propagated, whereas shallots are vegetatively multiplied.
7. Onions are almost disc-shaped bulbs while shallots can appear like elongated onions.

How to Pick a Good Onion

In general, when you’re choosing onions in the store, the best ones will be firm, have a crackly outer skin, and have a mild scent. If their scent is overwhelming it’s a good sign the onion is starting to spoil. Avoid onions with dark spots or mold as well, though every once in a while I’ll still purchase those if I’m going to use them right away (I guess that’s my altruistic side coming out–take one for the team, you know). On another note, onions tend to store better in a slightly cooler, darker area, although the fridge is not recommended. The onion smell has a tendency to spoil the flavor of other foods in the fridge.

Here is a great chart to help you decide what to use.  Oh wait, where do Leeks fit in?

Screen Shot 2017-11-16 at 5.01.27 PM

Leeks vs Green Onions 

leeks Leeks

Screen Shot 2017-11-16 at 6.42.09 PM

Onion is one vegetable that is an integral part of kitchens around the world. It is used both as a vegetable and also eaten raw in the form of salad. It has a pungent smell but used in cooking, to add to the flavor and aroma of many different types of food recipes. There are many different types of onions with green onions being very popular in European and Chinese cuisine. There is another variety called leek that confuses many because of its similarities with green onions. However, despite similarities, there are subtle differences also that prevent leeks being substituted with onions in many recipes.

Onion

Onion is a flowering plant belonging to the genus Allium that also contains garlic and leek. It is the edible bulb of onion plant that is used universally in cooking or as raw vegetable. Even the stem and the leaves of onion plant are used in cooking in many parts of the world. The most common and popular type of onion around the world is the red onion that is also called common onion. Onion bulb is known for its health benefits to human beings. It is anti-inflammatory, reduces cholesterol levels, and also has antioxidant properties. However, most people love it to consume onion bulb because of its taste and aroma. The paste of onion bulbs is used to thicken curries and to add to the flavor. The characteristic feature of red onion is its multilayered structure. It has a pungent smell and brings tears to the eyes of a person who cuts it into pieces.

One of the varieties of onions is green onion or scallion that is known by different names such as spring onions, baby onions, salad onions, gibbons, etc. These varieties have smaller bulbs that are not fully developed. The leaves are hollow from inside and are edible. These varieties are milder than red onions and used cooked as well as raw.

Leek

Leek is a plant that belongs to the family of genus Allium. It is a symbol of Wales and Welsh leeks are very popular all over Europe for their taste and aroma. Leek is a plant that does not produce a strong bulb and has long leaves that are cylindrical and crunchy to eat. People mistakenly refer to the heath of leaves as the stem of this plant. The part of these leaves that is just above the root or the bulb and is light green in color is edible though people also consume the hard and dark green part of the leaves of leeks too.


Leeks vs Green Onions

• Both green onions, as well as leeks, are part of the same onion family, but leeks are larger and are milder in taste and aroma than green onions.

• It is harder to cook the leaves of leeks while green onion leaves can be easily cooked.

• Leeks look like oversized green onions.

• Green onion leaves can be eaten raw, but leeks require to be cooked before consumption.

• One has to blanch the leaves of leeks as mud and dirt hides in between its leaves.

• It is the light green part of the leaves of leeks that are edible.

• Welsh leeks are very popular, and the vegetable is a national symbol of the country.

So did this help or are you now totally confused.

Once again ~ Happy Cooking!~

Onions ~ Onions ~ Onions ~ Onions

The Litter Dance

IMG_6704

This is Frostyman the Cat not wanting to model his lovely new Christmas outfit. I wonder if I am the only cat owner that wonders if your cat wakes up in the middle of the night takes a cup of cat litter and dances around the room (rooms) throwing it here and there.

When I retire at night, after watching TV or reading with Frostyman in my lap or in an adjacent chair I nicely put him out of the bedroom and close the door.  I know when I went upstairs to relax that I had a very clean floor.

When I come down in the morning there is magically spread cat hair and cat litter through out the entire downstairs and of course cat hair at the top of the stairs where he has impatiently been waiting for me to open the door and go down and feed him.

It always amazes me just how much litter and cat hair can appear overnight.  Now I do understand the pine needles that magically appear too, but the amount of litter always amazes me.

I clean the litter box every morning, so it is not from having a dirty box. Maybe I should try a new litter every time I buy new litter.  There has got to be something that does not come with the cat from the litter box.  We already have the litter box, so the cat goes through a door to his own private bathroom.

IMG_6708

So here is his private entry to his private bathroom,

IMG_6709

and here is his outdoor litter area.  I am thinking next house have a tunnel about six feel long to get there, with a grate he has to walk across, kind of like the ventilated plastic on this door that opens.

If anyone can suggest a better litter or better idea.  Please share with me.

The Litter Dance

Pain de Savoie

Pain de Savoie

Another successful Paul Hollywood bread recipe that is lovely to look at and even better to eat.  This one was devoured at my wine group. We were doing a Riesling night and the heavy texture with cheese and bacon was a perfect paring.  (or at least I thought so)

Pain de Savoie (makes 1 loaf)

400g strong white bread flour, plus extra for dusting

100g rye flour

10g salt

8g fast-action dried yeast

20ml olive oil, plus extra for oiling

330ml cool water

150g lardons, fried and cooled

200g Comté cheese, cut into 1cm cubes

Step 1: Mix the flours in a large bowl and add the salt to one side of the bowl and the yeast to the other. Add the olive oil and 250ml of the water and mix with the fingers of one hand. Add as much of the rest of the water as you need to form a soft dough; rye flour takes a lot of water so you should need most or all of it. Tip the dough onto an oiled work surface and knead well for 5–10 minutes or more, until the dough is smooth and elastic. Add the cooled lardons, working them well into the dough. Form the dough into a ball and put in a lightly oiled bowl. Cover with cling film or a tea towel and leave to rise until at least doubled or trebled in size – at least 2 hours.

Step 2: Turn the dough onto a lightly floured surface and divide into 3 equal pieces. Knock back by pushing down on the dough with the heels of your hands, then your knuckles and fingertips, and folding the dough in on itself several times. Form each piece into a ball.

Step 3: Oil a 20cm springform cake tin. Roll out a ball of dough to a 1.5–2cm thick circle, to fit the tin and lay it in the bottom. Scatter over half of the cheese. Roll out a similar disc of dough and lay on top. Add the rest of the cheese. Roll out the final ball of dough and place on top. Dust with flour. Put the tin inside a roomy plastic bag and leave to prove for about 1 hour, or until well puffed up. Meanwhile, heat your oven to 220°C. Bake the loaf in the oven for 30 minutes.

Leave to cool in the tin for 10 minutes, then remove and transfer to a wire rack to cool completely.

I am cooking my way through this book and have not yet had a failure, so really do recommend buying this book.  He shows you all the steps in wonderful photos, then shows you suggestions of what it tastes great with.  I have not been disappointed.  And I always leave the cookbook in my kitchen.  Not bad to look at either….

Happy Baking!


Pain de Savoie

Beached Surprise

IMG_1679

You just never know what might land on your waterfront.  This last week we had a decoration arrive.

IMG_1676

It just floated up and adorns our waterfront. I have seen a lot of things in the last fifteen years, but this is the closest and admittedly the “biggest”.  One year there were two huge diesel engines on an adjacent property, but they were small by comparison to this beauty.

IMG_1686

So when I posted photos on Facebook, friends suggested that I collect it and use as a coffee table.  What they did not grasp is that it would have to be a coffee table in the Land of Giants, as this puppy would not fit in my house.  So here is a photo to give you an idea of it’s immense size!

drifting

Got to love living on the beach!  Should I call the Coast Guard??

Beached Surprise

SWEET POTATO SOUP (Served with bacon crumbles and chives)

IMG_6676

This is a very simple, but luscious soup for cold fall evening, maybe after working in the garden in the day.  Serve it with a crusty Italian bread that you can dip in the soup and it is just perfection.  The recipe is from Cook’s Country and is undeniable good.

Sweet Potato Soup with Bacon and Chives

Slicing the sweet potatoes very thin allows them to cook very quickly. Add a salad and good bread to make a fast, easy supper.

WHY THIS RECIPE WORKS

Slicing the sweet potatoes very thin allows them to cook very quickly. Add a salad and good bread to make a fast, easy supper.

INGREDIENTS

INSTRUCTIONS

Serves 4
6 slices bacon, chopped
1 onion, chopped fine
1 teaspoon packed brown sugar
Salt and pepper
3 garlic cloves, minced
2 pounds sweet potatoes, peeled, quartered lengthwise, and sliced thin
4 cups low-sodium chicken broth
1 cup water
2 tablespoons minced fresh chives

If after cooking the bacon you don’t have quite 2 tablespoons of rendered fat in the pot, add olive oil to make up the difference. For a slightly spicy version of this soup, add 1/8 teaspoon cayenne pepper.


1. Cook bacon in Dutch oven over medium heat until crisp, 6 to 8 minutes. Using slotted spoon, transfer bacon to paper towel–lined plate; set aside. Discard all but 2 tablespoons bacon fat from now-empty pot. Add onion, sugar, and 1 teaspoon salt and cook, stirring occasionally, until onion is softened, 5 to 7 minutes. Stir in garlic and cook until fragrant, about 30 seconds. Add potatoes, broth, and water and bring to boil. Reduce heat to medium-low and simmer until potatoes are tender, about 10 minutes.

2. Working in batches, process soup in blender until smooth, 1 to 2 minutes. Season with salt and pepper to taste. Serve soup, sprinkled with bacon and chives.

SWEET POTATO SOUP (Served with bacon crumbles and chives)

Back to Baking & Soups Galore

Soups and Fall seem simultaneous. It is cold outside with a few snow flurries and I am looking out of the kitchen kneading bread and stirring soup.  This just makes my heart sing.  I some days wish I had a group of friends I could just call and say “Soup’s On”, please come on over.

I started making a lot of soup when I had a restaurant on Bainbridge Island in the 90’s.  Every day I would make a new soup, so there was always something different to try. I honestly wish there was a local restaurant that would do the same.  Most local restaurants have the same menu (and soup) day after day, month after month, and unfortunately year after year.

A little behind in my posting, but not in my cooking, so today I will add the recipes of the last week or so starting with yesterday.  IMG_6679

As a child on the weekends we often had Campbell’s tomato soup and a burnt grilled cheese sandwich (on Wonder bread). As an adult, the idea is appealing, but not the ingredients, so several years ago I started making my own tomato soup.  I don’t always use the same recipe (and now really don’t use one at all), but the ingredients must be fresh and wonderful for it to be tasty.  I love how it looks in the pot after it has been pureed.  Doesn’t that just look inviting!

This is what I did yesterday and scroll down for the Paul Hollywood Savory Brioche Couronne (bread with ham & cheese)

IMG_6681

Ingredients

10 Roma tomatoes

1 onion

A couple cups of home-made Chicken stock

1 tbsp of EVOO

3 – 5 garlic sliced thin ( I like garlic, so always throw in a little extra)

Hand-full of fresh oregano from my herb garden

Salt and Pepper to taste

1 cup or so of chopped basil

1 stick of butter ( oh yeah, that adds to the flavor)

1 cup or so of half & half or whipped cream

Fresh reggiano parmigiano for the top

Sour cream for the top  and I added chives for color (but just a little)

INSTRUCTIONS

1. Adjust oven rack to upper-middle position and heat oven to 450 degrees. Combine quartered tomatoes, onions, whole garlic cloves, oil, 1/2 teaspoon salt, and 1/4 teaspoon sugar in large roasting pan. Roast, stirring once or twice, until tomatoes are brown in spots, about 11/2 hours. Let cool 5 minutes. Working in two batches, process roasted tomato mixture in food processor until smooth. (Pureed mixture can be refrigerated for up to 1 day.)

2. Put the mixture back in the pot, add the chicken stock, basil, oregano, butter and cream and simmer a few minutes.  Taste it and add salt & pepper to your taste.

3. Put in a pretty bowl and top with sour cream and a little shredded parmesan.

IMG_6683

Ingredients


Back to Baking & Soups Galore

Bergers – Style Cookies

IMG_6583

Bergers-Style Cookies

Saw this recipe in Cooks Country Big Thanksgiving Cookbook and since I have book group coming tonight, thought this might be fun to serve.  I probably should put some spider legs on them, since Halloween is right around the corner, but I think I will be civil and boring today.  But these cookies are mouth-watering relish!  I just had one with my coffee for breakfast!  Yummy!

The magazine has lots of interesting information, suggestions and the other recipes look good too. I might have to try the Dutch Apple Pie or the easy Fish & Chips.  When I make a pie and only eat one slice, I take it to my local fire station so it can be enjoyed and not thrown out.  They seem to look forward to the treats I drop by.

WHY THIS RECIPE WORKS

This Baltimorean cookie has gained a cult following thanks to the 1/2-inch layer of fudgy chocolate frosting perched on its cakey, lightly sweet vanilla cookie base. For our version, we creamed butter with sugar and used cake flour instead of all-purpose to create a soft, fluffy cookie base. For the signature sweet-yet-ultrachocolaty frosting, a combination of milk chocolate chips and Dutch-processed cocoa gave us the best chocolate flavor; heavy cream and confectioners’ sugar helped us nail the correct texture. Keeping the frosting between 90 and 100 degrees (which makes it the texture of thick brownie batter) ensured that it was easy to mound a hefty 2-tablespoon helping onto each cookie.

Read More

INGREDIENTS

INSTRUCTIONS

Makes 24 cookies ( I only got 16)

COOKIES

2 cups (8 ounces) cake flour
1 ½ teaspoons baking powder
¼ teaspoon salt
8 tablespoons unsalted butter, softened
¾ cup (5 1/4 ounces) granulated sugar
1 large egg white
1 ½ tablespoons heavy cream
1 ½ teaspoons vanilla extract

FROSTING

3 cups (18 ounces) milk chocolate chips
1 ¼ cups heavy cream
¼ teaspoon salt
1 ⅔ cups (5 ounces) Dutch-processed cocoa powder
1 ¼ cups (5 ounces) confectioners’ sugar
1 ½ teaspoons vanilla extract

The consistency of the frosting should resemble that of a thick brownie batter. It should mound and slowly spread over the cookies. It’s OK if some of the frosting drips down the sides of the cookies. If the frosting’s temperature drops below 90 degrees, it may become too thick to spread. To bring it back to its proper consistency, simply microwave it at 50 percent power in 5-second intervals, whisking after each interval. Our favorite Dutch-processed cocoa powder is Droste Cocoa.

1. FOR THE COOKIES: Adjust oven rack to middle position and heat oven to 350 degrees. Line 2 baking sheets with parchment paper. Whisk flour, baking powder, and salt together in bowl; set aside. Using stand mixer fitted with paddle, beat butter and sugar on medium-high speed until pale and fluffy, about 3 minutes.

2. Add egg white, cream, and vanilla and beat until combined. Reduce speed to low and add flour mixture in 3 additions until incorporated, scraping down bowl as needed.

3. Working with 1 heaping tablespoon dough at a time, roll into balls and space 2 inches apart on prepared sheets, 12 per sheet. Using your moistened fingers, press dough balls to form disks about 1/4 inch thick and 2 inches in diameter. Bake, 1 sheet at a time, until cookies are just beginning to brown around edges, 8 to 10 minutes, rotating sheet halfway through baking. Let cookies cool completely on sheet.

4. FOR THE FROSTING: Once cookies have cooled, combine chocolate chips, cream, and salt in large bowl. Microwave chocolate mixture at 50 percent power, stirring occasionally, until melted and smooth, 1 to 3 minutes. Whisk cocoa, sugar, and vanilla into chocolate mixture until smooth. (Frosting should be texture of thick brownie batter and register about 95 degrees.)

5. Flip cookies on sheets. Spoon 2 tablespoons frosting over flat side of each cookie to form mound. Let cookies sit at room temperature until frosting is set, about 3 hours. Serve. (Cookies can be stored in airtight container at room temperature for up to 2 days.)

Bergers – Style Cookies

Bread & Butter Pickles

IMG_6538

Here is another easy and fairly fast recipe that I made the other day.  I just put my jars in the dishwasher at the highest temperature, rather than do the whole water bath described by America’s Test Kitchen.  The cucumbers are from my garden and the lone red bell pepper is the only one that lived in my garden.  Happy to put the two together in the same recipe. My husband loves these on hamburgers or as my youngest son called them: “Hammaburgers”.  I like them just plain as a side dish or on a slice of delicious bread.

Bread-and-Butter Pickles

WHY THIS RECIPE WORKS

We wanted a bread-and-butter pickle with a crisp texture and a balance of sweet and sour—perfect for adding to a char-grilled burger. Most recipes combine cucumbers and onions in a spiced, syrupy brine; we cut back on the sugar and added red bell pepper for its fresh flavor and color. Cucumbers can lose their crunch when processed in a boiling water bath; we found that combining several crisping techniques gave us the best results. We tossed our sliced vegetables in salt to draw out excess water.

We added a small amount of Ball Pickle Crisp, which helps keep the natural pectin from breaking down, resulting in firmer pickles. Finally, rather than processing in a boiling-water bath, we employed a technique known as low-temperature pasteurization, which involved maintaining our pickles in a hot-water bath at a temperature of 180 to 185 degrees Fahrenheit for 30 minutes—in this temperature range microorganisms are destroyed and pectin remains largely intact.

INGREDIENTS

Print Shopping List

2 pounds pickling cucumbers, ends trimmed, sliced 1/4 inch thick
1 onion, quartered and sliced thin
1 red bell pepper, stemmed, seeded, and cut into 1 1/2‑inch matchsticks
2 tablespoons canning and pickling salt
3 cups apple cider vinegar
2 cups sugar
1 cup water
1 tablespoon yellow mustard seeds
¾ teaspoon ground turmeric
½ teaspoon celery seeds
¼ teaspoon ground cloves
½ teaspoon Ball Pickle Crisp
FOUR 1-PINT JARS

1. Toss cucumbers, onion, and bell pepper with salt in large bowl and refrigerate for 3 hours. Drain vegetables in colander (do not rinse), then pat dry with paper towels.

2. Meanwhile, set canning rack in large pot, place four 1‑pint jars in rack, and add water to cover by 1 inch. Bring to simmer over medium high heat, then turn off heat and cover to keep hot.

3. Bring vinegar, sugar, water, mustard seeds, turmeric, celery seeds, and cloves to boil in large saucepan over medium-high heat; cover and remove from heat.

4. Place dish towel flat on counter. Using jar lifter, remove jars from pot, draining water back into pot. Place jars upside down on towel and let dry for 1 minute. Add 1/8 teaspoon Pickle Crisp to each hot jar, then pack tightly with vegetables.

5. Return brine to brief boil. Using funnel and ladle, pour hot brine over cucumbers to cover, distributing spices evenly leaving 1/2 inch headspace. Slide wooden skewer along inside of jar, pressing slightly on vegetables to remove air bubbles, and add extra brine as needed. 6a. For short-term storage: Let jars cool to room temperature, cover with lids, and refrigerate for 1 day before serving. (Pickles can be refrigerated for up to 3 months; flavor will continue to mature over time.) 6b. For long-term storage: While jars are warm, wipe rims clean, add lids, and screw on rings until fingertip-tight; do not overtighten. Before processing jars, heat water in canning pot to temperature between 120 and 140 degrees. Lower jars into water, bring water to 180 to 185 degrees, then cook for 30 minutes, adjusting heat as needed to maintain water between 180 and 185 degrees. Remove jars from pot and let cool for 24 hours. Remove rings, check seal, and clean rims. (Sealed jars can be stored for up to 1 year.)

Bread & Butter Pickles